In the Solana blockchain ecosystem, SOL is the native token used for paying transaction fees, staking, and participating in network governance. However, in certain DeFi applications, DEX trading, or smart contract interactions, users need to convert SOL to Wrapped SOL (abbreviated as WSOL), which is a token form that complies with SPL (Solana Program Library) standards. WSOL is essentially a wrapped version of SOL that allows SOL to circulate on Solana in an ERC-20-like standard, making it compatible with more protocols and tools. Conversely, when users complete related operations, they often need to exchange WSOL back to native SOL to restore its native functionality or for daily transfers. The process of exchanging WSOL for SOL is also known as 'unwrap,' which is a relatively simple operation, but it is crucial for novice users to understand its principles and steps. This tutorial will guide you in detail on how to use the professional tool platform GTokenTool to convert WSOL to SOL.
Detailed exchange steps
The process of exchanging WSOL for SOL is divided into two main directions: SOL to WSOL (wrapping) and WSOL to SOL (unwrapping). This tutorial focuses on WSOL to SOL but will briefly summarize the former for complete understanding. The entire operation is conducted on the GTokenTool platform, which has a clean and intuitive interface.
Step one: Connect wallet
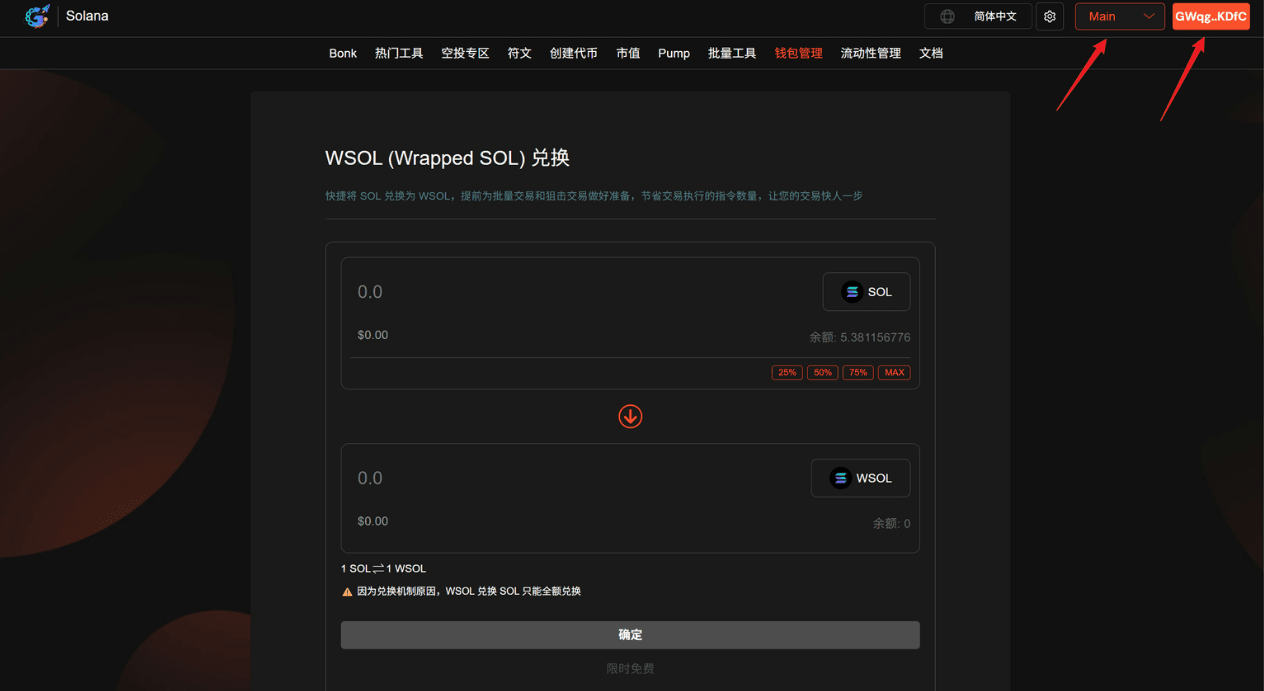
Open the GTokenTool exchange page, ensuring it is in Mainnet mode (usually there is a network switch button at the top of the page; switch if it is not Mainnet).
Connect wallet: In the upper right corner of the page, click the 'Connect Wallet' button. The system will pop up a wallet selection window to choose your wallet (e.g., Phantom). If using a browser plugin, the wallet will be automatically detected and connected.
Authorize connection: The wallet app or plugin will pop up a confirmation window; click 'Connect' or 'Approve'. Once connected, the page will display your wallet address and current balance (SOL and WSOL). If the connection fails, check if the wallet is unlocked or if the network matches.
This step is crucial because subsequent operations require wallet signatures. After connecting, the platform does not access your private key and is used solely for transaction authorization.
Step two: SOL to WSOL (wrapping, optional reference)
Although this tutorial focuses on WSOL to SOL, understanding the wrapping process helps in understanding the reverse operation.
In the default mode of the page (usually SOL→WSOL), enter the exchange amount. You can:
Directly enter a specific SOL amount, for example, '10'.
Select the percentage button, such as 25%, 50%, 75%, or 100%, and the system will automatically calculate the proportion of the wallet's SOL balance.
Check input: Ensure the amount does not exceed the available balance. The page will display the expected WSOL output in real-time (1:1 ratio).
Click 'Confirm': The system generates the transaction, and a confirmation window pops up in the wallet. Review the transaction details, including gas fee estimates (usually very low).
Confirm transaction: Click 'Confirm' in the wallet. The transaction is broadcast to the Solana network and completes within seconds. A 'Exchange Successful' prompt will pop up, and WSOL has been deposited into your SPL token account.
This process creates an associated account to store WSOL. Gas fees are paid with SOL.
Step three: WSOL to SOL (unwrapping, focus)
This is the core of the tutorial: exchanging WSOL back to SOL.
Switch exchange direction: In the center of the page, click the switch button to change the mode from SOL→WSOL to WSOL→SOL. The interface will update accordingly to show the WSOL input box.
Enter exchange amount: Similar to the wrapping process: Note: If your WSOL balance is zero, the operation is invalid. Please check the balance first (the page will display it).
Manually enter the WSOL amount, for example, '5'.
Or select the percentage button to calculate based on wallet WSOL balance.
Preview exchange: After input, the page shows the expected SOL output (still 1:1). Confirm that it is correct.
Click 'Confirm': Generate the transaction, and a confirmation window pops up in the wallet. Read the details carefully to ensure it is an unwrap operation.
Approve transaction: Click 'Confirm' in the wallet. The Solana network processes quickly, usually completing in 1-5 seconds.
Success feedback: The page shows a 'Exchange Successful' popup. WSOL is burned, and an equivalent amount of SOL is returned to your native account. Meanwhile, the associated account may close, releasing rental fees.
After the exchange, refresh the wallet to see the balance change. If the transaction gets stuck, you can input the transaction hash in Solana Explorer to check the status.
Step four: Verification and subsequent management
Verify balance: Check the increase in SOL and decrease in WSOL in the wallet app.
Manage accounts: If wrapping/unwrapping multiple times, you may accumulate several associated accounts. Use the wallet tool to close unused accounts and reclaim rental fees.
Record transaction: Save the transaction ID for auditing or tax purposes.
Conclusion
Through this tutorial, you have mastered the entire process of exchanging WSOL for SOL. From preparation to execution, to risk management, each step is designed to ensure safety and efficiency. The Solana ecosystem is rapidly developing, and being proficient with such tools will help you engage better in DeFi and Web3. Remember, practice is the best teacher; start with small amounts.
