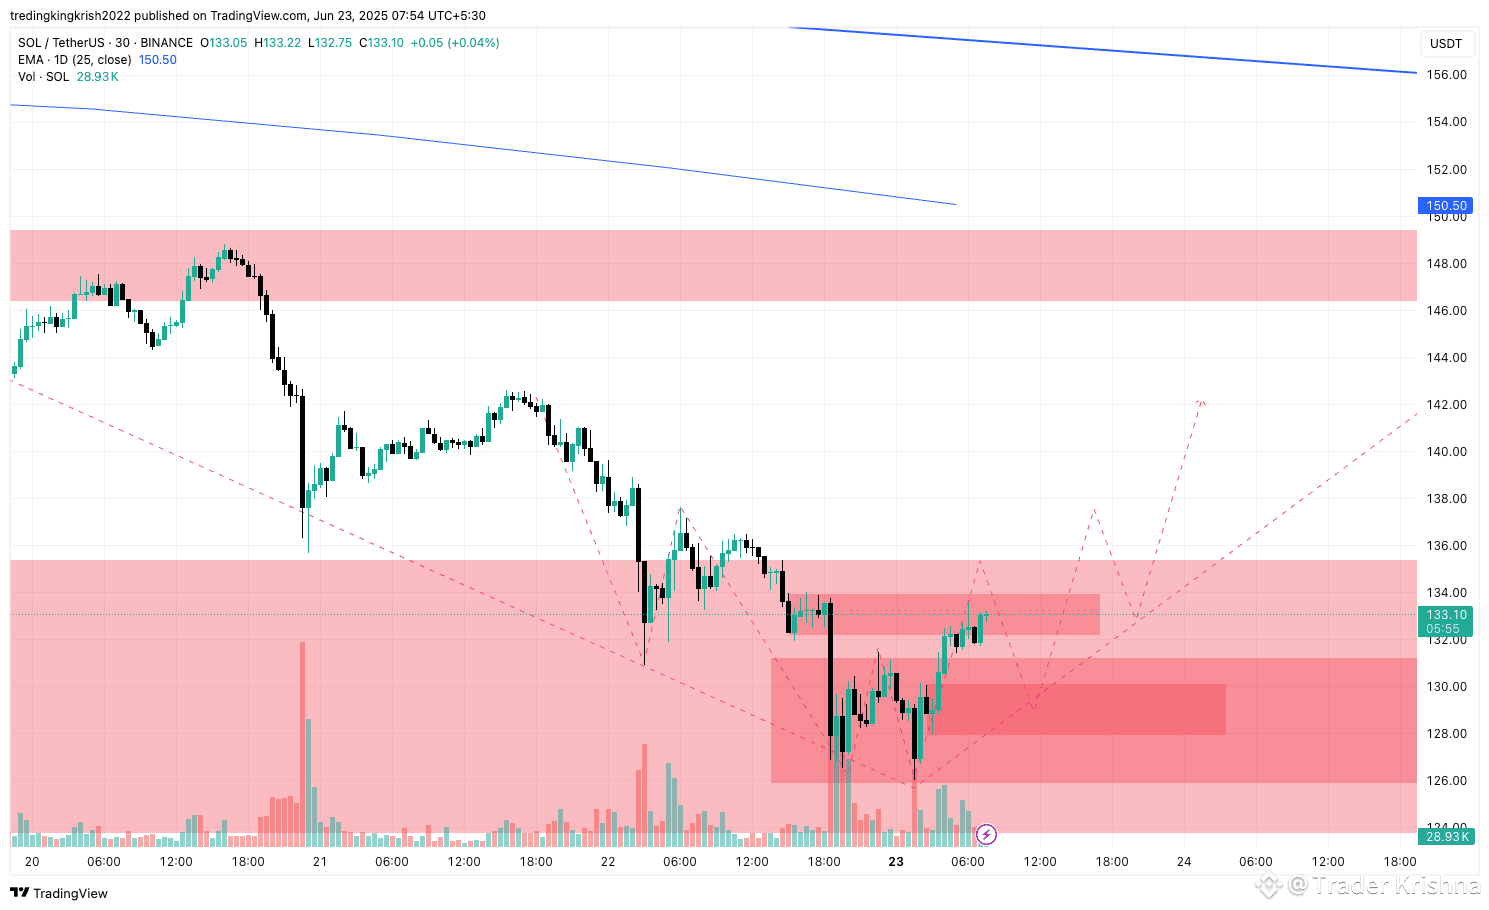
🔍 Current Price: $133.10
⏱️ Timeframe: 30-Minute
📊 EMA (25): $150.50 (acting as macro resistance)
🧠 Trade Idea: Range-to-Breakout Strategy
🔸 Key Zones:
Demand Zone (Support): $127–$130
Supply Zone (Resistance): $134–$136 and $146–$150
Volume Spike Support Zone: Strong rejection and volume support near $127–$129
🔫 Long Setup (Primary Bias)
✅ Entry:
On retest of $130–$131 zone (ideal entry after minor rejection from $134)
OR on breakout and retest of $134 zone (confirmation of strength)
🎯 Targets:
TP1: $136 (local supply zone)
TP2: $142 (mid-resistance area)
TP3: $148–$150 (macro supply zone + EMA 25D)
🛡️ Stop Loss:
SL below $127 (invalidates bullish structure)
🔻 Short Setup (If rejection from $134):
✅ Entry:
Bearish rejection from $134–$136 with high selling volume
🎯 Targets:
TP1: $130 (retest of support)
TP2: $127 (lower demand zone)
🛡️ Stop Loss:
SL above $137.5 (above supply rejection zone)
🧠 Notes:
Look for price reaction at $134 zone before deciding direction.
Volume confirmation is key — increased volume at breakout = high conviction.
EMA 25D ($150) is a longer-term resistance zone — use caution at that level.