
OpenClaw quick installation and usage
- Core environment: Node.js 22+ & Git
- Supported systems: Windows / macOS
- Key steps:
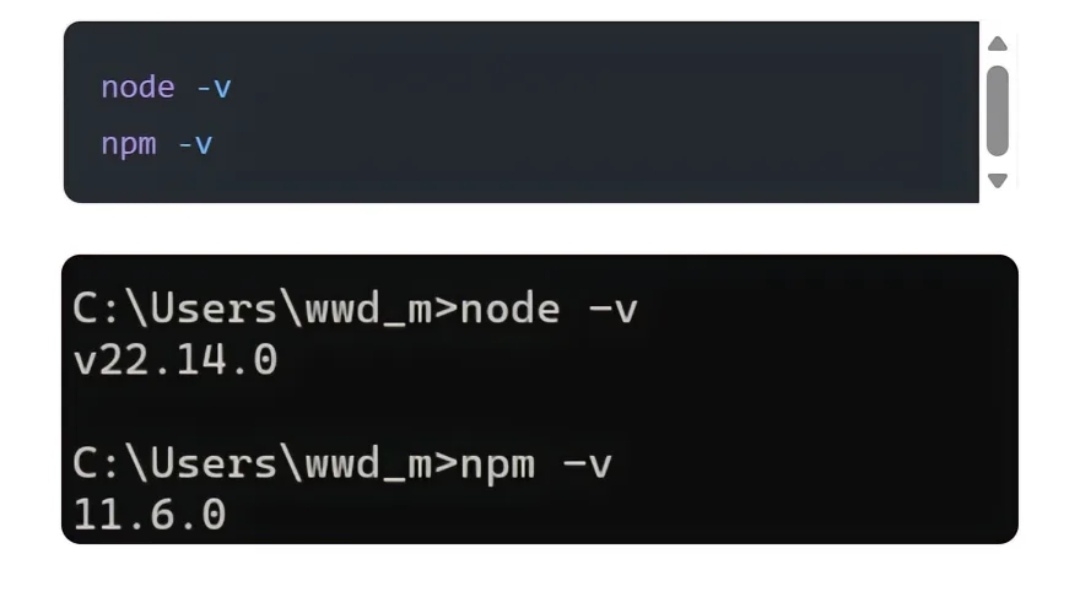
1. Install Node.js, check the Node version.
2. Switch npm to domestic mirror source (to prevent timeout).
3. Global installation and initialization configuration.
I. Environment requirements
Before starting the installation, ensure the system meets the following environment requirements:
- Node.js: Version must be greater than 22.
- Git: Install the Git version control tool.
After installation, execute the following command in the command line (Terminal or cmd) to check the version, ensuring the output version number:
2. Configure domestic npm mirror source
To avoid installation timeouts or failures in the network environment of mainland China, it is recommended to first configure npm to use domestic mirror sources:
npm config set registry https://registry.npmmirror.com/
After configuration is complete, you can run the following command to verify if it is effective:
npm config get registry
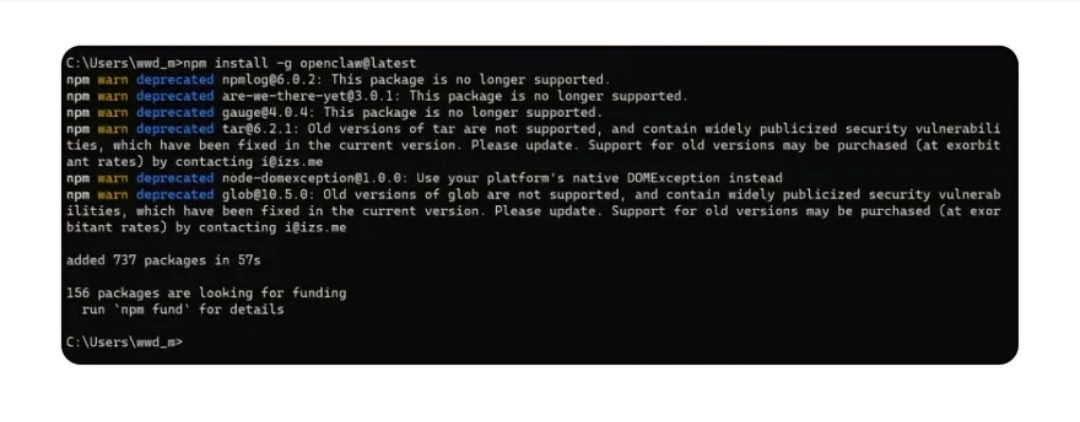
3. Globally install OpenClaw
Use the npm command to install the latest version of OpenClaw in the global environment:
npm install -g openclaw@latest
Example output (Windows environment):
4. Initialization configuration and background service
After installation is complete, run the initialization command (the specific command is not shown in the image, refer to the official documentation or subsequent steps)
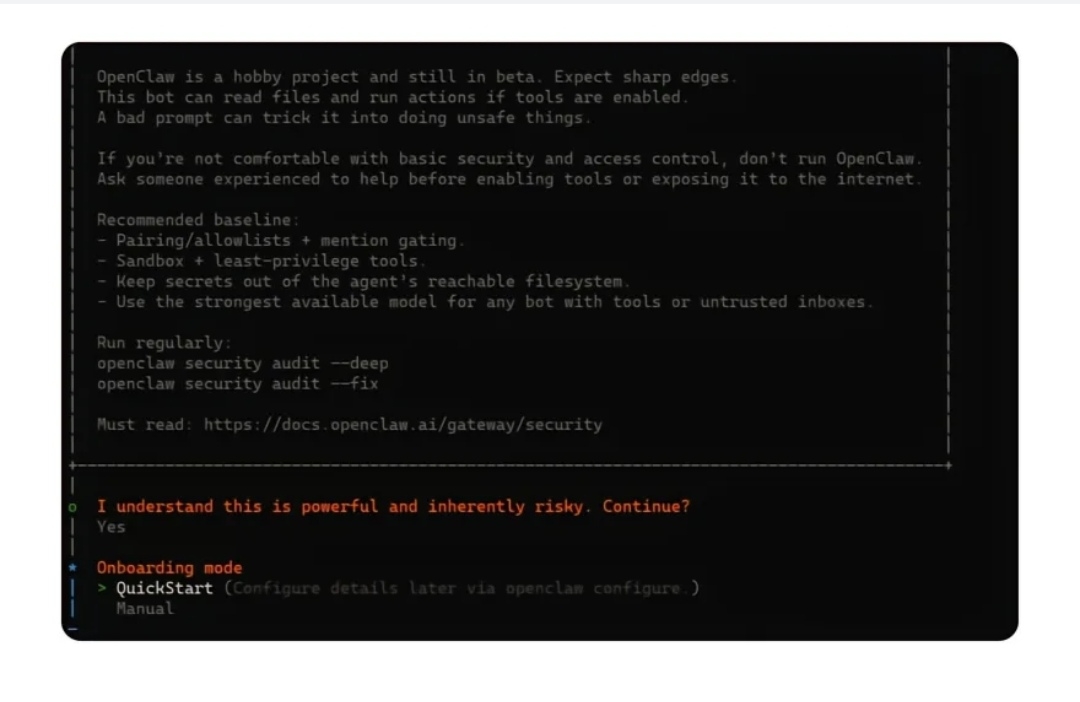
Initialization configuration wizard
Run the following command to start the OpenClaw configuration wizard:
openclaw onboard --install-daemo
Configuration steps:
1. When the security prompt I understand this is powerful and inherently risky. Continue? appears, enter Yes and press Enter.
2. When selecting Onboarding mode, choose QuickStart (the configuration can later be modified using the openclaw configure command).
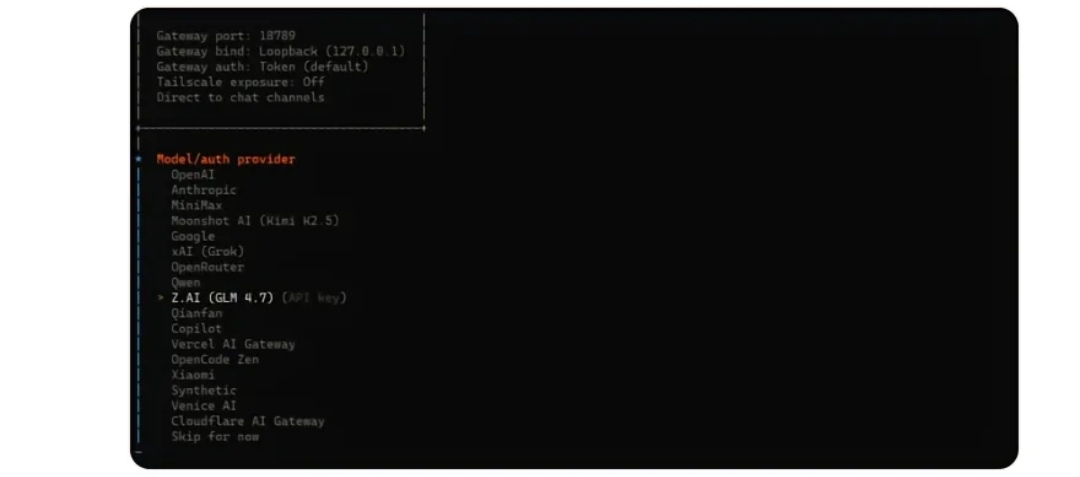
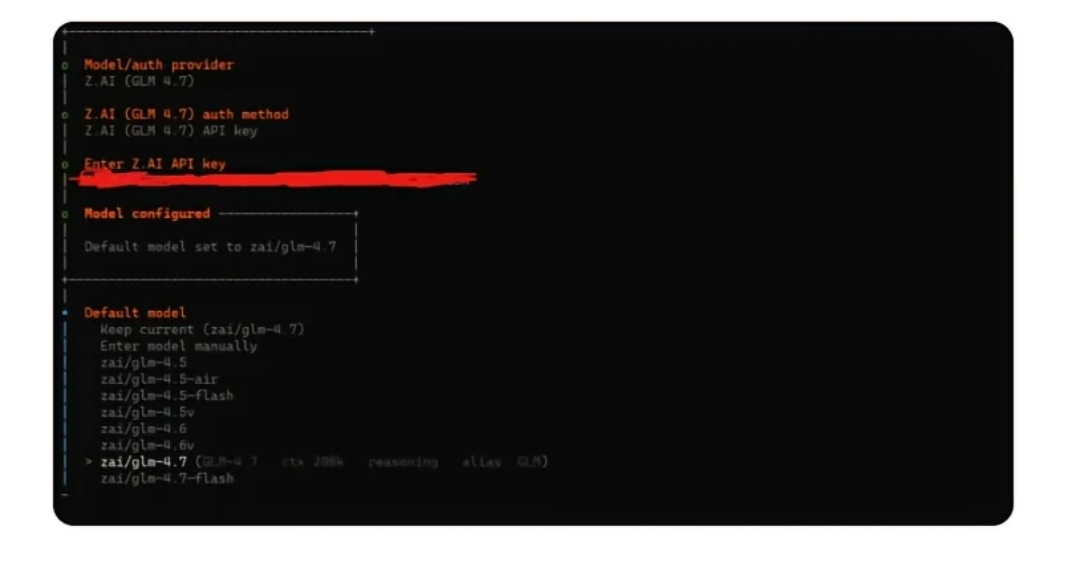
3. Select AI large model
In the third question of the configuration wizard, you need to select an AI large model as the backend service for OpenClaw. Here we take Z. AI (GLM 4.7) (Zhizhu AI) as an example.
4. Configure Zhizhu GLM-4.7 API Key
This step completes the integration of OpenClaw with the Zhizhu AI large model, the core is to obtain and configure a valid API Key, the specific process and key points are as follows:
Core operational steps
1). Obtain API Key
Go to the Zhizhu AI official platform (Zhizhu Open Platform), complete account registration and real-name authentication, and create and copy your exclusive API Key in the 'API Key Management' section.
2). Enter the authentication key
At the Enter Z AI API key prompt in the command line, paste the obtained API Key and press Enter; the system will automatically complete the model authentication configuration.
3). Select a specific model
After authentication, select zai/glm-4-7 from the Default model list, confirm to complete the final configuration of the model.
5. Complete the initialization configuration and access the graphical interface
This is the final stage of the OpenClaw installation configuration, the core logic is to simplify the initial process and quickly enter the visual management phase, the specific operations and core information are as follows:
1. Skip non-essential configuration items
In the subsequent steps of the command line configuration wizard, all non-core options can be temporarily skipped, and fine-tuned settings can be applied after entering the graphical interface:
1). Skill configuration: When prompted with Configure skills now? (recommended), select No.
2). Channel selection: In the Select channel (QuickStart) list, choose Skip for now to skip binding to chat software (such as Telegram, Discord, WeChat, etc.).
3). Note: Functions such as skill installation and channel integration can later be completed through visual operations in the graphical interface, skipping the initial phase can significantly shorten deployment time.

2. Access the graphical management interface
After the initialization configuration is complete, the system will automatically start the OpenClaw background service and enter the visual operation phase:
1). Automatic access: After the service starts successfully, the default browser will usually automatically pop up and load the OpenClaw graphical interface.
2). Manual access: If the browser does not automatically pop up, enter the following address in any browser's address bar to access manually: http://127.0.0.1:18789
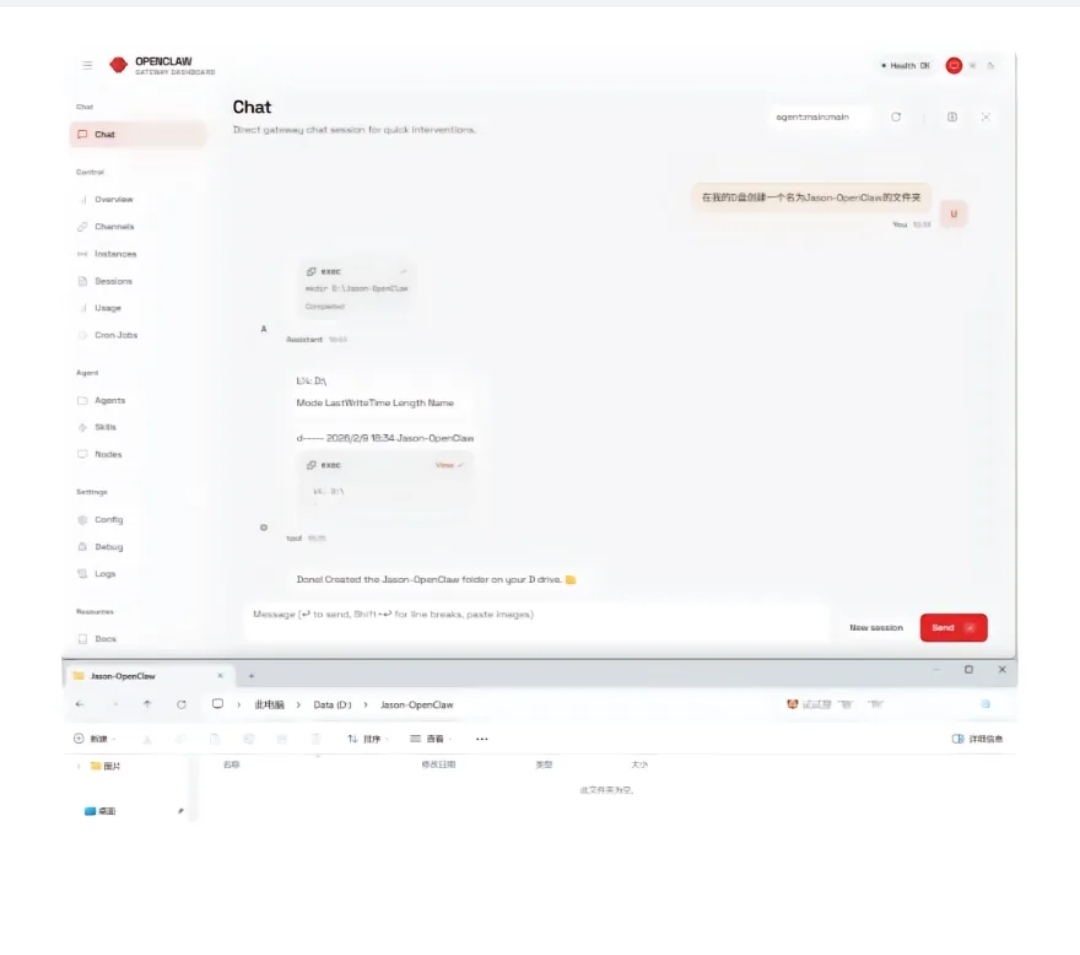
3. Function verification: Create a folder using AI commands.
This is the core function verification step after OpenClaw installation, used to confirm that the agent has file system operation capabilities:
1). Operation instructions
Enter in the AI dialog box of the OpenClaw graphical interface: Create a folder named Jason-OpenClaw on my D drive.
2). Execution process
- OpenClaw agents parse instructions and automatically call the exec tool to execute the mkdir D:\Jason-OpenClaw command.
- The system returns the operation log, confirming that the folder was created successfully.
3). Verification standards
- The AI responds with a clear prompt 'Done! Created the Jason-OpenClaw folder on your D drive.'
- The Jason-OpenClaw folder can be found in the root directory of the D drive in the local file manager.
6. Precautions
1. Later manually start OpenClaw
If the service is interrupted or needs to be restarted, you can execute the following command in the command line to specify the port to start the gateway service:
openclaw gateway --port 18789
2. Token consumption prompt
- The multi-round reasoning and tool calls of the agent will significantly increase token consumption compared to ordinary web-based AI dialogues.
- It is recommended to first use an AI API Key with free quota for trial; after familiarizing with the features and costs, choose to subscribe to a paid plan (like coding plan).
3. Security and privacy
- This quick installation method is suitable for trial and testing; be careful: do not let AI directly operate your private data.
- Once fully familiar with the agent's usage, it is recommended to deploy it on a virtual machine or cloud server (such as Alibaba Cloud or Tencent Cloud) to achieve physical isolation from local private data and enhance security.