
Bid (support): you often see concentrated limits in the local support zone on the order book — this creates a 'base' for bounces.
Ask (resistance): a 'wall' of sales can sit at short resistance levels; a breakout is usually accompanied by an increase in taker-buy volume.
Practice: focus on executed transactions (taker trades), not just placed orders — these show the real demand.
Technical picture (1H / 4H / 1D).
1H: narrow consolidation; indicators (RSI/MACD) often in neutral zone — momentum is weak.
4H: base formation after volatile move; confirmation of medium-term reversal — close 4H above local resistance with volume growth.
1D: for a sustainable bullish scenario, confirmation on the daily timeframe and stable volume growth is needed.
Action Plan — step by step and professionally.
Target: controlled accumulation with clear risk management.
Positioning and risk.
Risk per trade: 1% of capital on initial lot; total risk at full stack — up to 3–4%.
Approach: Laddering — 3 entry levels; partial takes; trail-stop for the remainder.
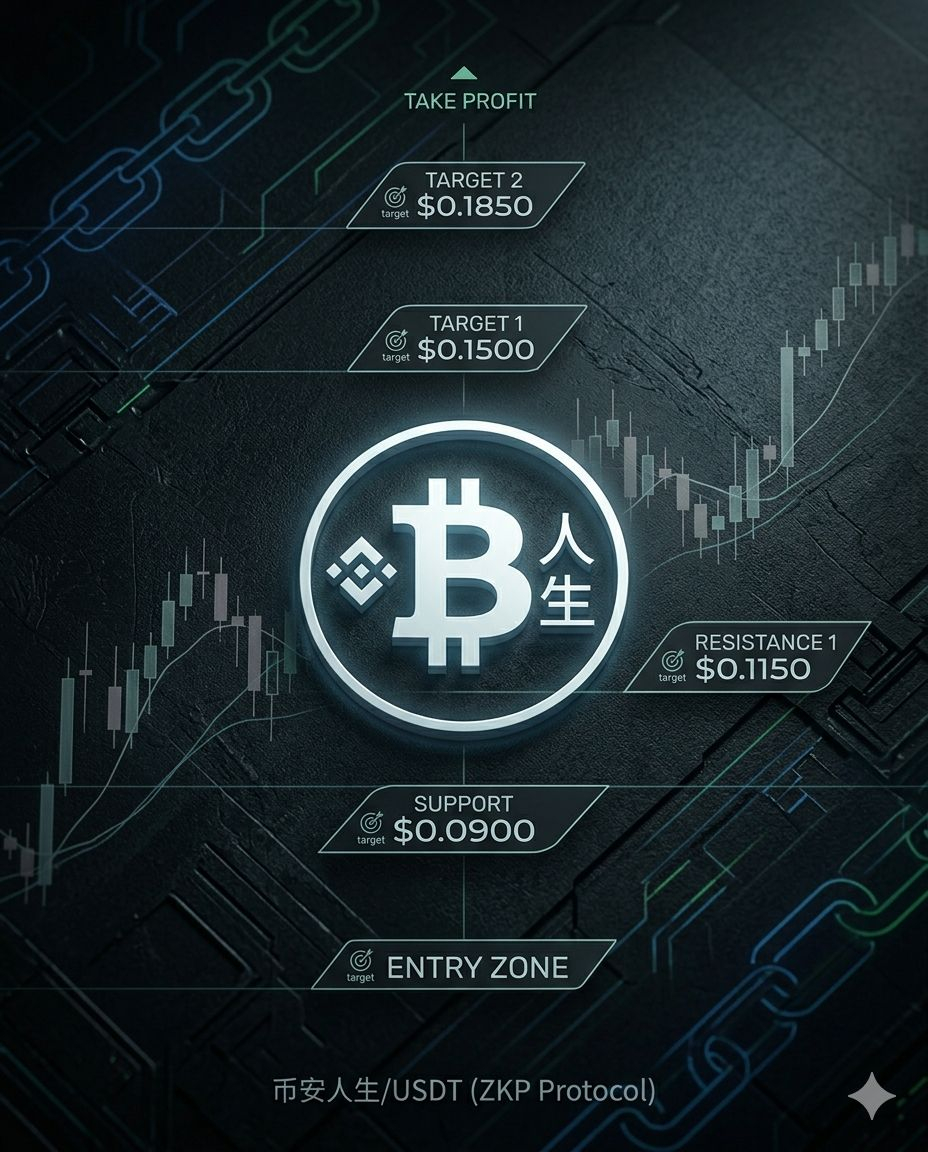
Entry points (Limit Orders).
Lot A (30%) — upper part of the support zone (limit buy).
Lot B (30%) — middle of the support zone (limit buy).
Lot C (40%) — lower part of the support zone or retest after confirmed breakout of resistance.
Aggressive variant.
Entry: Market/Limit on bounce from support with 25–50% planned volume.
Target: quick take on first support; tight SL.
Entry after confirming the breakout.
Trigger: 1H/4H closes above local resistance with noticeable volume increase.
Action: add 50–100% of initial position on retest of the broken level.
Exits and takes.
Take 1: close 30–50% of position at first local support/resistance.
Take 2: close additional 30–50% at medium-term target.
Trail-stop: after reaching Take1, move the remainder to trail-stop at +3–5% from local lows.
Stop-loss.
Hard SL: below local support; full exit on 1H/4H close below the zone.
Risks and checks (mandatory).
Order book manipulation: large orders may disappear; focus on filled trades.
Slippage: with market orders on low liquidity.
Fundamental risks: unlocks, listings, official project announcements.
Psychology: stick to the plan; don’t stack under FOMO; log decisions in trading journal.
Technical audit in brief.
Support holds tests — a sign of accumulation if confirmed by filled trades.
Volatility compression + stable volumes = potential for momentum on breakout of resistance.
Check on-chain and news before major entries.
#CryptoForgeAlpha #AltcoinAnalysis #币安人生的磁条 #BinanceLife #Orderflow
Binance life — hourly update. I'm stacking in parts at support zone; SL below local support; Takes on retests of resistances.