
Your phone is the key to your digital assets.
Imagine this scenario: you're at a café unlocking your phone, and someone nearby quietly memorizes your password. The moment you put your phone down to grab your coffee, it gets snatched.
Password known + phone in hand = account, payments, privacy, all exposed.
This isn't a hypothesis; it's a real theft tactic.
Apple has given you a countermeasure, but you might not have activated it.
There's a feature on the iPhone called 'Stolen Device Protection' specifically designed to tackle the 'password seen + phone stolen' combo attack.
'Stolen Device Protection' how does it protect you? 🛡️
After enabling, high-risk operations cannot be executed solely with a password; must be verified through Face ID or fingerprint:
Check passwords saved in Keychain
Modify Apple ID
Disable 'Find My iPhone'
Erase device data
Changing Apple ID and similar operations will also trigger a 1-hour waiting period and require secondary biometric verification, giving you enough time to remotely lock the device
In daily life, at common places like your home or office, these restrictions won't affect your user experience.
Step 1: Confirm 'Stolen Device Protection' is enabled ✅
Check system version: Settings → General → About
iOS 17.3 and above: supports this feature
iOS 17.3 and below: recommended to upgrade the system (Settings → General → Software Update)
Compatible models: iPhone that supports Face ID or Touch ID
To enable 'Stolen Device Protection', you must enable two-factor authentication for your Apple account and set up or enable the following features on your iPhone: device passcode, Face ID or Touch ID, and 'Significant Locations' (location services).
How to enable 'Significant Locations':
Go to 'Settings' → 'Privacy & Security' → 'Location Services' → at the bottom 'System Services' → 'Significant Locations', ensure the switch is turned on. After enabling, the iPhone will automatically learn your frequent locations without needing manual input. Note: If just enabled, the system will take some time to recognize 'familiar locations'
You also need to enable 'Find My', and after enabling 'Stolen Device Protection', you cannot disable 'Find My'.
'Stolen Device Protection' may be enabled by default. If 'Stolen Device Protection' is not enabled, you can turn on this feature in 'Settings':
Go to 'Settings', then tap 'Face ID & Passcode'.
Enter your device passcode.
Tap 'Stolen Device Protection', then turn 'Stolen Device Protection' on or off.
For more information, please refer to the official Apple introduction: https://support.apple.com/zh-cn/120340


'How to choose security delay?'
This setting determines: when you modify important phone settings at certain locations, you need to wait for a 1-hour security delay.
📍 When leaving familiar locations
✅ Pros:
Smooth operations at home/work, unaffected by delays
Good daily experience, doesn't affect normal use
Still offers protection in real theft scenarios (unfamiliar locations)
❌ Cons:
If your phone is stolen in a 'familiar location' (like home), the protection is relatively weak
Relies on location services to determine position; may fail if location is inaccurate
🔒 Always
✅ Pros:
The highest level of security protection, effective at any location
Even if stolen in a familiar location, it can prevent quick account tampering
❌ Cons:
Even at home, modifying your Apple ID password or disabling Face ID must wait 1 hour
In emergencies (like forgetting your password and needing a reset), it can be inconvenient
Daily usage feels a bit more frictional
Step 2: Enable Passkey for your Binance account 🗝️
'Stolen Device Protection' guards the system gates, but there’s more critical account security to strengthen.
We have practically tested this scenario:
Even if someone simultaneously obtains your phone and unlock password, when trying to extract assets from your Binance account, the system will force Face ID or fingerprint verification on the iPhone, and cannot operate solely with the PIN code.
This is because: the iPhone does not allow direct retrieval of Passkey via password; it must go through biometric recognition.
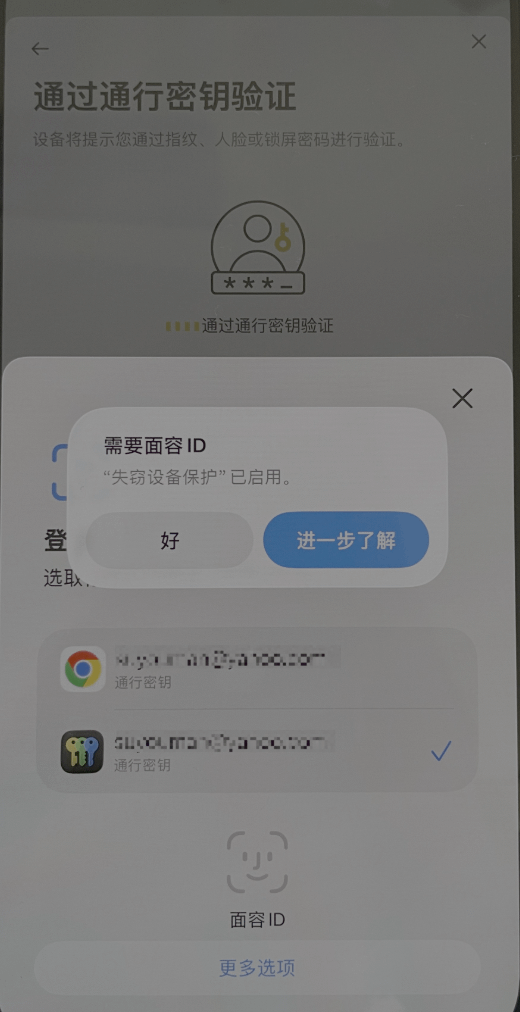
Enabling Passkey is like adding a unique security lock at the account level.
👉 How to create a Passkey for your Binance account, see the official help document:
Binance official guide
Risk management starts with you 🔐
Most of the actual risk cases we handle every day stem from **'device theft and control'**.
Your phone holds login credentials, verification codes, and even direct payment channels. Only you can lock down the security of your assets.
Two-step approach to truly lock down risks:
1️⃣ Enable 'Stolen Device Protection'
2️⃣ Enable Passkey for your Binance account
⚡ Simple operation, protective effect is immediately noticeable.
Protect your digital assets starting now!