$ETH ## Market Insights: Core Contradiction
The key for bears lies in: the absolute suppression of the "tunnel" and the resonance of bull exhaustion.
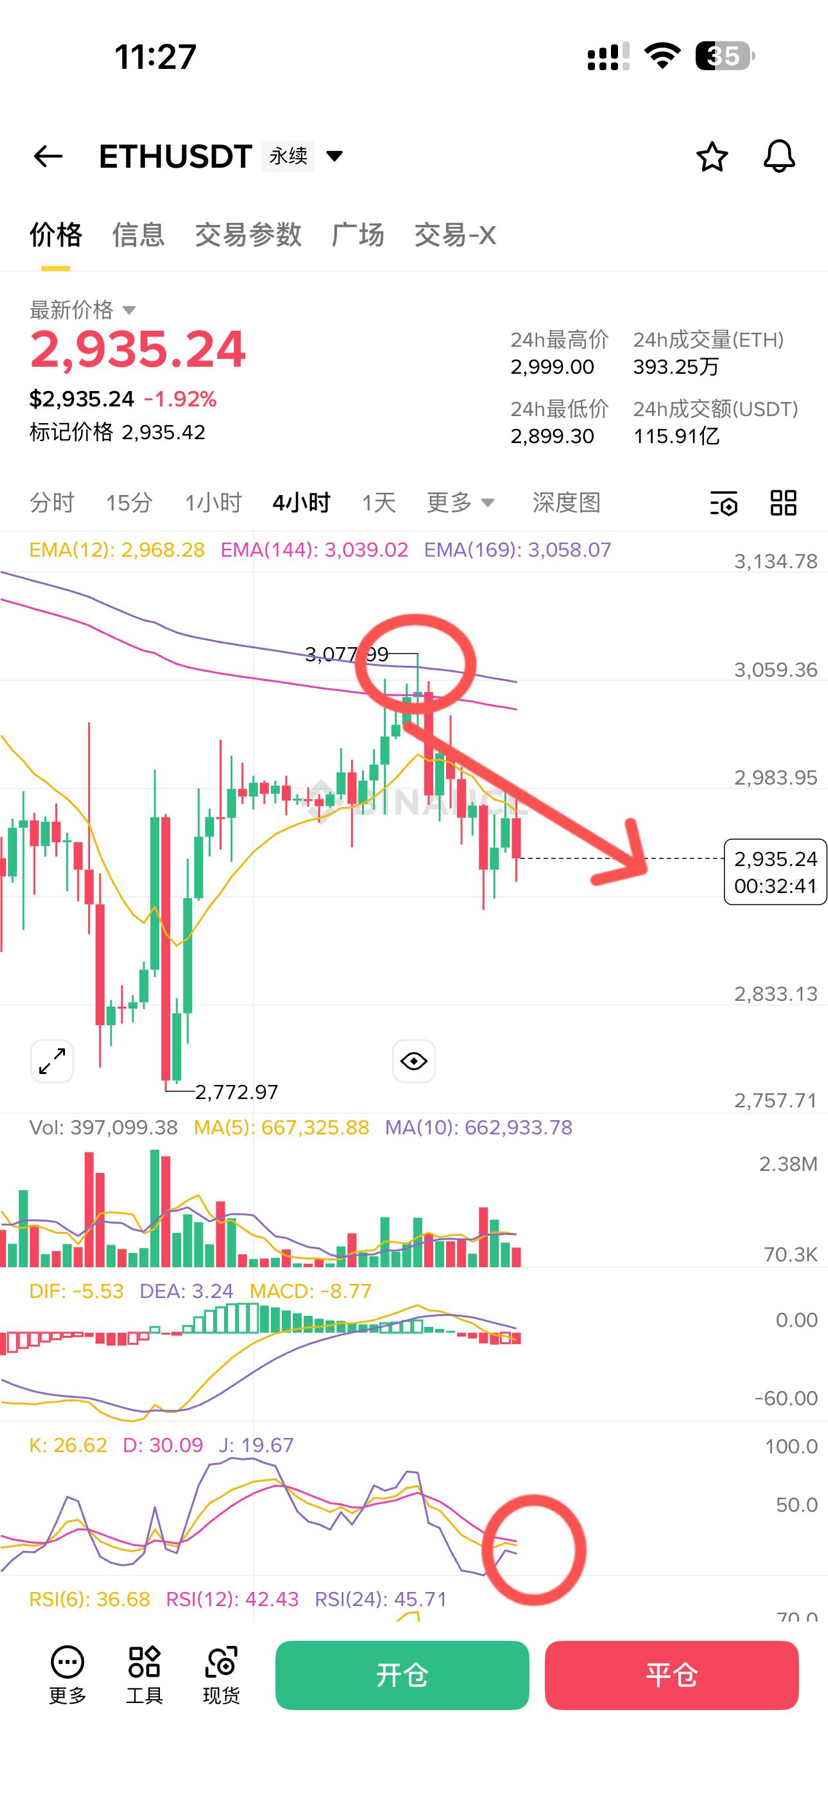
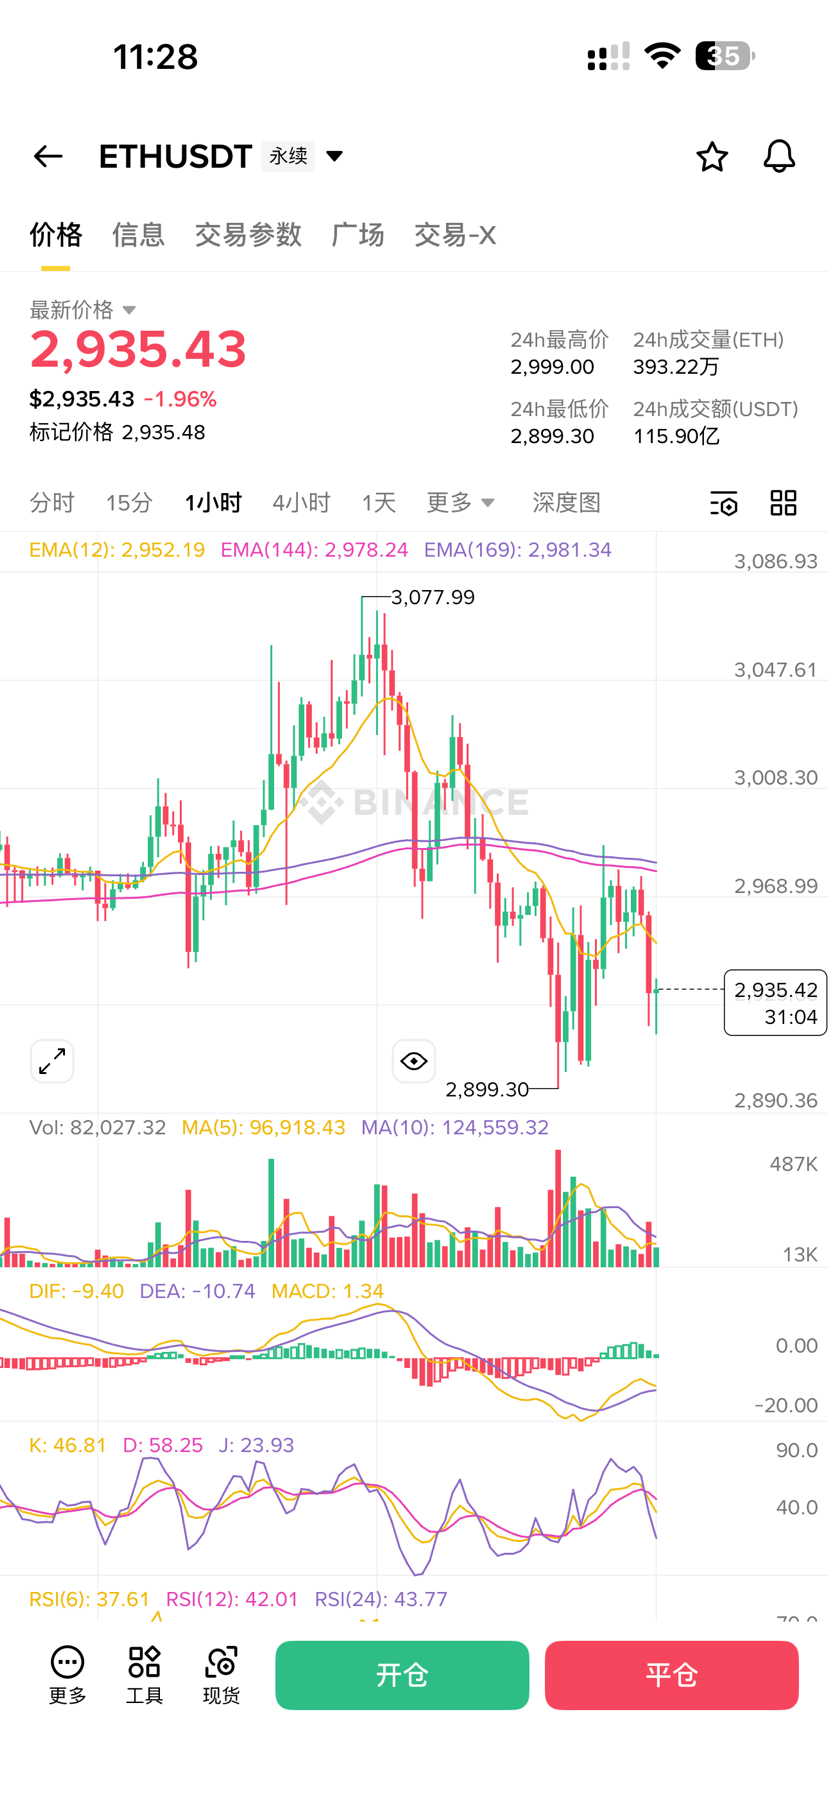
Trend Direction: Whether on the 1-hour or 4-hour level, the price is operating below the EMA(144) and EMA(169) tunnel. In trend trading, **"staying below the tunnel means less talk"** is a strict rule for bears.

Resistance Effectiveness: Observe Chart 1 (1-hour chart), each time the price rebounds and touches the yellow moving average (EMA12) or enters the tunnel zone, it quickly leaves a long upper shadow or directly engulfs with a bearish candle. This indicates heavy selling pressure above, and each rebound is an opportunity for bears to increase positions.

Bulls Exhausted: Support level $2,899 has been tested repeatedly. In technical analysis, the more times a support level is touched, the weaker it becomes. The strength of the bulls' rebound is getting weaker, indicating that the buying interest is retreating.
## Win Rate Assessment: ⭐⭐⭐⭐ (4 stars)
Conclusion: High win rate, belonging to the standard paradigm of 'trend reversal shorts'.
Reasons for High Win Rate: 1. Resonance Suppression: The moving average systems at 1-hour and 4-hour levels form a perfect bearish arrangement. 2. Space Opening: If the daily level (Figure 2) loses $2,900, there will only be decent structural support down to around $2,620, making the risk-reward ratio excellent.
Risk Point: Be wary of a significant rebound resembling a 'pin bar wash' occurring at this position.
## Operation Script: Plan your trade
The bears do not recommend directly shorting at the current position of $2,935, as it is too close to the small support below, making the risk-reward ratio unfavorable.
1. Entry Position Settings
Scenario A (Rebound Short - Optimal Plan): Place orders in the range of $2,980 - $3,000. This is the overlap zone of the 1-hour tunnel and the previous area of intense fluctuations; a rebound here is very likely to encounter secondary resistance.
Scenario B (Breakout Short - Confirmation Plan): Price breaks down through $2,890 with volume, wait for a 15-minute level pullback confirming it does not break $2,900 before entering in the direction of the trend.
2. Defensive Position (Stop Loss) Logic
Stop Loss Reference: Set at $3,050.
Logic: This is above the 4-hour level tunnel (EMA169). If the price can stabilize here, it indicates that the short-term bearish down structure has been broken, and the bears should immediately exit and observe whether it turns into a consolidation.
3. Target Level (Take Profit)
First Target: $2,850 (structural key point).
Final Target: $2,620 (previous low strong support).
## Psychological Game: Trap Reminder
As a bear, you need to be aware of the following psychological biases:
Fear of 'floor shorts': Watching the price continuously drop, fearing that entering now is on the 'floor'. Remember, once a trend is established, it can continue to decline. The key is the accuracy of the entry point and decisiveness of the stop loss.
Scared away by the 'false breakout': Frequent wicks may occur around $2,980, which is the last struggle of the bulls. As long as the candlestick cannot stabilize above the tunnel, do not easily doubt your bearish judgment.
## Summary: The soul of this trade
Do not go against the trend to catch that thorny rebound; only push down that precarious stone when a giant wave pulls back.
